So, I bought a new camera the other day and I love it! I have been thinking for some time that I need to make a camera bag. Now I have two Canon cameras and a telephoto lens that I want to carry around and I had nothing that they would fit in. I have looked at the stores for a bag, but they start at $50 and go up and I have not found one that I really liked. For a temporary solution, so I can travel with my cameras and accessories, I did this:

It is a 16 can Coleman cooler bag that I added padding to. Everything fits and it was less than $20. When I do eventually get around to making the "perfect" camera bag, I can convert it back to a cooler!
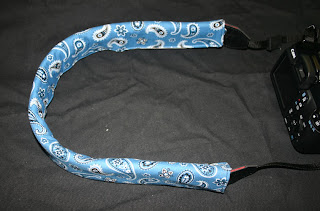
I really wanted to make a strap cover for my new camera....and the old one too. I love all the great tutorials out there on the internet, but I didn't want to have to undo my strap to put the cover on. I often am out on hot, sunny days shooting pictures and I wanted to be able to easily remove the cover and wash it. Sooo... I made a strap wrap!
Here's how I did it:
For a strap that is 2 in. wide by 24 in. long....standard Canon strap that will go just to the top of the black vinyl that attaches to the web strap. I may make the next one a little longer..maybe 26". You can measure and decide what works for you.
Cut 1 piece decorative fabric 6 1/2 in x 24 in.
Cut 1 piece of lining fabric 6 1/2 in. x 24 in.
Cut 1 piece of batting 6 1/2 in x 24 in.
You will also need a velcro strip approximately 22 in.
Take the hook side of the velcro and center it lengthwise and set in from the side about 1/2 in on the lining piece. I use a glue stick to temporarily hold it in place so that I can sew it.

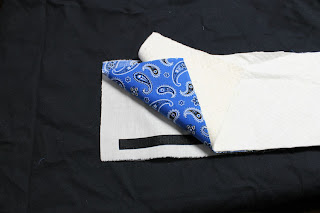
Once the velcro strip is sewn in place, layer your pieces. Lay the lining face up (the side with the velcro strip). Next lay the decorative fabric face down on top of the lining piece. (so they are right sides together). Last lay the batting on top of the decorative fabric.
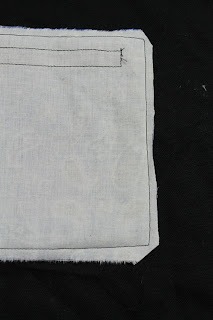
Sew around all side using a 1/4 in. seam allowance and leave and opening approximately 6 in. for turning.

Trim the corners at an angle so there is less bulk.
Turn right side out and press. Press the opening with raw edges turned under.

Topstitch around all sides. This will also close the opening.

Align the loop portion of the velcro 1/2 in. from the side and centered on top of the decorative fabric. This is done on the side opposite of the hook tape that was sewn to the lining. Again I used the glue stick to hold it while I sewed it down.
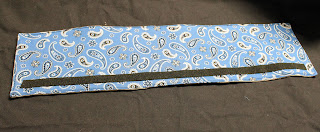
Here is another picture so you can see clearly how the two velcro strips are placed. This is the cover folded back on itself just for illustration purposes.
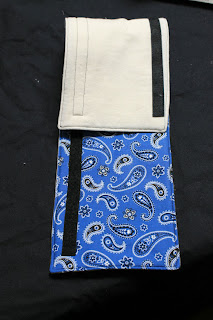
The "strap wrap" is now complete and ready to be attached.

I attach mine with the velcro side toward my neck. I wondered if the velcro would be stiff and uncomfortable and I am happy to say it is not! Definitely get the sewn in kind though because I think it is softer.
Hope this gives you some ideas!


